Transitions on the building envelope such as expansion joints, control joints and window-to-wall connections, are among the most susceptible points for failure. While product performance and compatibility are key, preventing water intrusion also relies upon the quality of the sealant application.
When sealing basic connections using traditional means and methods, sealant and backer rod, the process of caulking is quite simple: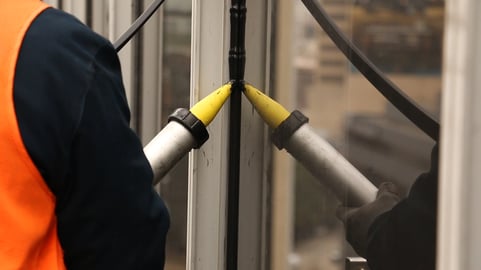
-
Substrate Preparation
- The substrate surface must be clean, dry, and free from frost or dew
- The substrate surface should be sound and resilient enough to not break away under the sealant's tension. If the substrate is cracked or crumbling, talk to the manufacturer to discuss appropriate repairs prior to applying sealant.
-
Sealant Selection
- The right sealant technology (i.e. polyurethane versus silicone) should be chosen to accommodate the anticipated joint movement.
- The sealant must be compatible with surrounding materials and develop proper adhesion to the substrates to provide a viable seal. Testing should always take place to verify adhesion (with or without a primer) and compatibility before starting the project.
-
Sealant Application and Placement
- Sealant placement is critical. It is important to place the sealant in its designed location for the system to function.
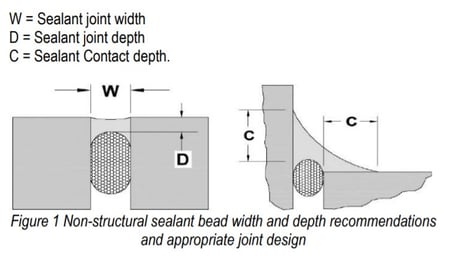
- When sealing joints and gaps, avoid three-sided adhesion by using bond breaker tape and/or backer rod.
- The shape of the sealant bead is also important for each application- see Figure 1.
- Apply the right amount of sealant. Too much sealant and the joint will be too rigid to move. Too little and the sealant may not have the strength to accommodate the movement and fail prematurely.
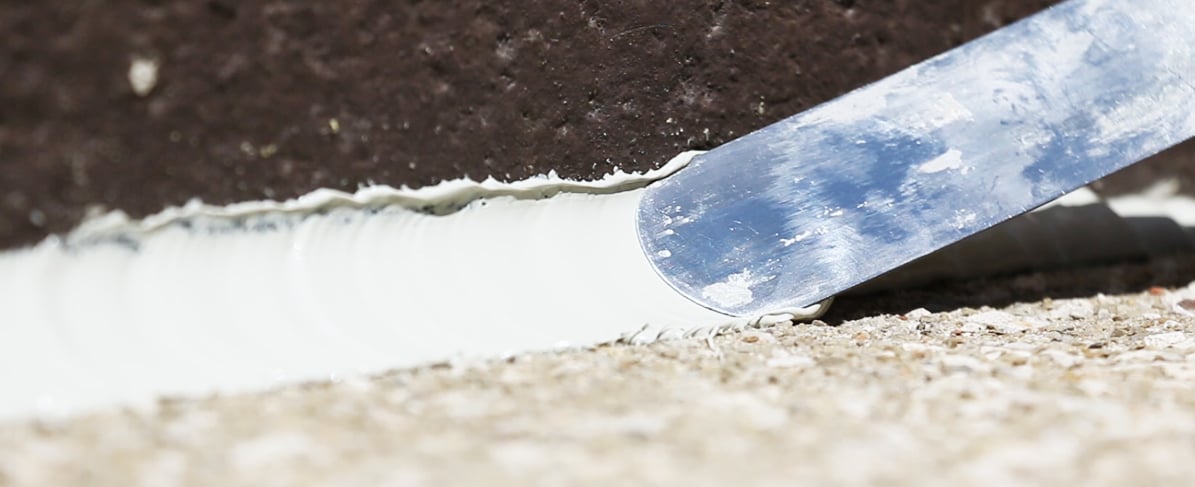
- Sealants must always be tooled to promote wet out of the sealant to the surface of the substrate. Most sealant manufacturers recommend a minimum of ¼” of bite on each side of the joint. For more information on creating good sealant geometry, review Tremco’s Restoration Guide.
- Once on the job site, field adhesion testing should also be conducted to verify the quality of the joint seal.
In theory, these guidelines are easily achievable. However, environmental challenges or time constraints can put pressure on an applicator. With long-term performance in mind, these steps are a necessity to reduce the risks of failed sealant joints, which can lead to an unsightly and potentially leaking building. For complex details or product compatibility, contact your manufacturer for assistance.