On the construction site, there is nothing worse than having to duplicate work due to a mistake somewhere in the application process. Thankfully, the easy-to-conduct field adhesion test allows you to verify the installed quality of a joint seal before it is too late. Performing this test prior to the full application allows for early detection of problems, which can help to minimize the cost associated with sealant restoration projects.
The field adhesion test is a hand pull test of a cut area of joint sealant, which provides a good indicator of the fundamental adhesive properties of a sealant on a particular substrate. It is a very useful tool for evaluating the effects of various cleaning methods and primers. Note, that it is most important to verify adhesion and joint configuration at the start of the project for the various construction materials that may come in contact with the sealant(s) used.
Potential Pitfalls
Potential pitfalls that could be detected using this field adhesion test include:
- Contaminated or expired sealant or primer
- Improper substrate cleaning
- Incorrect primer selection
- Improper joint configuration
- Poor priming techniques
- Three-sided adhesion (i.e. absence of or improper installation of backing material)
- Excessive substrate movement
- Presence of bond breaking material(s) at bond lines (i.e. moisture, frost, incompatible coatings, etc.)
- Incomplete fill of the sealant into the joint
%20Field%20Adhesion%20Test.jpg?width=203&name=(Fig%208-6)%20Field%20Adhesion%20Test.jpg)
Field Adhesion Test Log
A field adhesion test log should be maintained also to document the
procedures and help ensure installation consistency and performance throughout the project.
The field adhesion log should record:
- Date, project name and location of the adhesion test
- Installed age and identity of sealant
- Test results
- Type of failure that occurs upon full extension of the sealant, cohesive or adhesive
- Percent extension of sealant prior to cohesive or adhesive failure
- Sealant configuration (width and depth)
A cohesive failure occurs when the bond between sealant particles breaks, while still adhering to the substrate. This is the desired mode of failure. An adhesive failure occurs when the sealant breaks apart from the substrate.
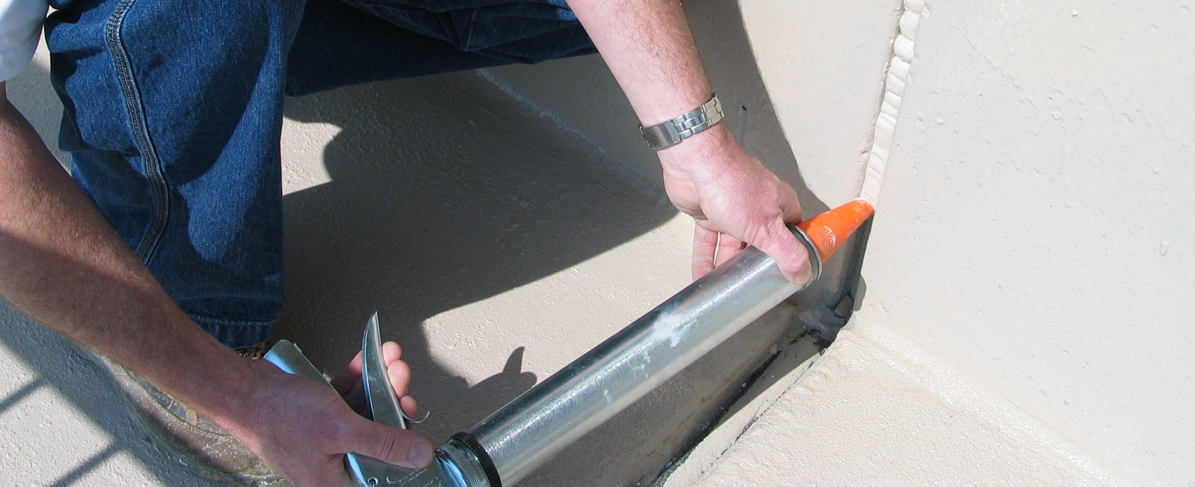
How to Run a Field Adhesion Test
We recommend that one adhesion test be performed every 100' (31 m) of joint over the first 1,000' (305 m) of install sealant as soon as the sealant has fully cured. The field adhesion test procedures, according to ASTM C1521 Standard Guide for Use of Joint Sealants are as follows:
1) Cut through the sealant across the joint width
2) Cut 3" (76 mm) along the substrate/sealant interface on both sides
3) Grasp the sealant tab 1" (25 mm) from its bonded surface
4) Pull the tab of sealant at a 90° angle
5) Record the type of failure that occurs upon full extension to failure and the degree of force required (little or much)
6) Record the percent extension of the sealant tab at full extension prior to any failure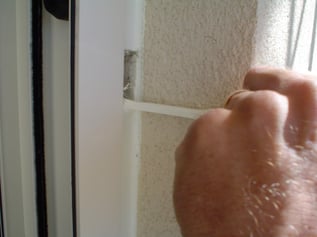
If good results are obtained from the tests of the first 1,000' (305 m), future field adhesion testing should proceed at a lesser rate of:
1) One test per 1,000' (305 m) of:
2) One test per floor per elevation
3) One test per week per installation crew
Utilizing Your Results
If poor results are obtained in a field adhesion test, work should be stopped to verify the root cause and magnitude of the problem. Once the cause of the problem is identified, corrective measures can be implemented. The area yielding the poor results should be identified by additional, more frequent field adhesion tests in the affected area(s). The daily log should be analyzed to see if there is anything unique about the poor results area.
Good results are defined as meeting the standards for adhesion and joint configuration established in the mock-up application.

Repairing the Joint
The field adhesion test is a destructive test that should be repaired immediately. This will help to maintain the weatherproofing integrity of the repaired area. In most cases, it is simply a matter of gunning in new sealant to replace the cut area. Ensure that the original sealant surfaces are clean and that the new sealant fully wets out all contact areas.
For more information on sealant restoration, download our Restoration Guide. For specific questions, contact your local Tremco Representative.